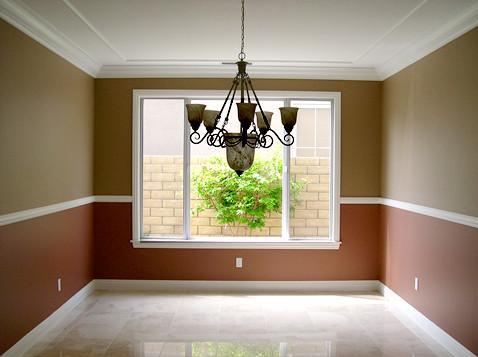
Chair rails are generally needed for your drawing rooms to protect walls from damage caused by friction from the back of chairs. If we talk about the position of chair rail molding, it is placed horizontally on the wall at the approximate height of a chair back and enhances the beauty of your wall. The important thing to be kept in mind is that you must fasten the molding to the studs for it to be secured to the wall. A unique way of using chair rails is to frame photos on the wall using them. You can also go for different shapes rather than the normal square framing to make your wall look dazzling. On top of that if you use furniture that matches the design, the room will have an altogether new look. The step wise detail of how to install eco-friendly chair rails is described below:

Step 1: Measure the wall and mark a level line
The first step should be to measure the wall and after getting a fair idea of the length you can make an assumption as to the length of chair rail molding that will be needed to furnish the room. The calculation to find out the height of the chair rail is very simple. You need to measure the height of the ceiling and divide it by three. As a rule, you should place the chair rail about one-third of the way up from the floor. You can slide the chair to the wall to see where it hits the wall and mark it. After the height is determined you need to use your tape measure and level to make a level line along the total length of the room. Using a level to set the line will make sure that your chair rail is placed straight because floors are not always level.
Step 2: Mark and Cut the Molding
It is advisable to mark a molding of the first piece at your miter saw. The most easy way is to start with an inside corner and use a square cut. One piece of molding should be used for a single wall stretch. If by chance the wall appears to be longer than the length of a single piece of molding, two such pieces should be joined together. Opposite cuts at a 45 degrees angle should be used at the meeting ends as it will create a cleaner, smoother joint.
Step 3: Attach the molding to wall
Once the work of cutting the molding is over, you should start installing them beginning with the inside corner. You need to set the bottom of the molding and adjust it with the level line you had marked before. You should then attach the first piece to the wall with the help of wood glue and pin it to the wall using nailer and finishing nails. In order to avoid splitting, you are advised to insert the nails into the high parts of the molding. The wall or molding might not necessarily be perfectly straight, so you may have to manually place the molding perfectly in line as you move further.
Step 4: Smoothen the surface and apply paint
Once the chair rail molding has been installed, you can use a nail set to flatten the nail heads. A wood filler can be used to cover the nail holes. A gentle sanding should be given to the molding to smoothen the joints. Paintable caulk can be used for the edge of the molding where it meets the wall or to fill in any other holes or gaps if required. At the end, apply color paint of your choice to the chair rail to give it an elegant look.
Time Required:
The time required totally depends on the individual and his skills. Although it may vary according to the length of the room where the chair rail has to be installed.
Risk Involved:
- You are advised to wear eye protection when operating power tools as it may cause harm to the naked eye.
- While using devices such as a hammer to drive nails, you must be extra cautious or it can cause serious injury to your hand.
Now you don’t have to spend a huge amount of money or hire an interior designer to decorate your room. A simple and elegant chair rail is enough to work wonders. So what are you waiting for? Go get chair rails installed in your rooms.


