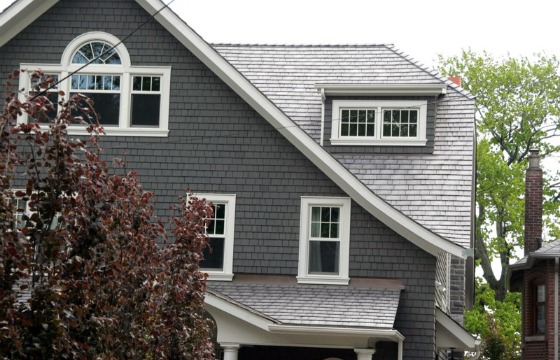
Cedar shingles are a new way of adding elegance to your home. In use since long, cedar shingles ensure that your home remains a favorite with friends and family alike. The golden color of cedar shingle fades to light grey with passing time. However, you need not to worry as this happens naturally owing to extremes of climate.

Cedar shingles comes naturally to ones mind when one talks about shingle roofing. This term refers to olden times, when the technique of cedar shingle use for roof construction was slightly different from the present times. Cedar shingles were chipped off layers with a froe and a chisel. This gave the cedar shingle a smooth and refined look, a trend that has been carried on to the present times.
Installation technique
As the process of laying cedar shingles begins, wood sheathing is laid under the cedar shingle. This allows the units (cedar shingle) to integrate with roof. One by four inch is attached with weather exposed area of the shingle. A five and a half inch area of shingle is left unexposed.
The technique while laying cedar shingle is somewhat similar to the procedure of brick laying. Each row of cedar shingle is laid in a manner that there is no angling of joints.
Nails are used to fasten the cedar shingle to the sheathing underneath. Care should be taken that the nails are three by four inches from the edge and half to one inch above exposure line of cedar shingle. The joints between cedar shingles need to be one by four to three by eight inches wide.
Installation process
1. You need to start from one end of the roof. Begin by laying a layer of roofing felt on bottom edge of roof. It is best, if the roofing felt is left hanging by one-fourth of an inch on the sides. The felt is to be stapled to the roof every few inches.
2. A layer of cedar shingle is to be put over the roofing in such a manner that shingles overhang from the roof. The thick end of the cedar shingle needs to face down. The edge of the cedar shingle is to be lined up with the shingle that has been installed previously. Four to six nails are to be used to attach the shingle firmly. The nails can be used in the top half or thick edges of the cedar shingle.
3. A second layer of cedar shingle being placed over the first one to create a double-row of cedar shingles. The first shingle in the row needs to be cut vertically. This is done to ensure that the shingle is half of its original width. This cedar shingle is laid at the end of the row. A row of shingles is to be laid to this vertically cut shingle. This helps cover any gaps between cedar shingles in first layer.
4. Ensure that you have a layer of roofing felt over the double-row of cedar shingles. This is done so as to ensure that it overlaps the row of shingles. This is to be attached to the roof with four to six nails.
5. You need to continue to the top until only the top remains. The same process is to be repeated on the other side of the roof till the time you are able to install cedar shingle all the way down.
6. The last row of the cedar shingle is to be attached on second side of the roof. This is done to ensure that the tops of the shingle are in alinement with roof peak. The shingles are to be placed on opposite side of the top. This is done to ensure that tops of the cedar shingle extend over the peak by one to two inches. Fix the cedar shingles with nails.
Maintenance
Your cedar shingle roof is exposed to various elements as heat, rain, snow and wind. With time, moisture and dust builds up and can cause deterioration and loosening of the cedar shingle. Copper napthanate and zinc solution, if applied to the cedar shingle roof on a regular basis, can help the roof be in its best shape.
Avoid using any waterproof products while cleaning the cedar shingle roof. These block off the air and moisture routes and can cause serious damage to the shingle roofing.
Cedar shingle not only increase the esthetic appeal of your home but also ensure that it remains elegant and desirable for long.


