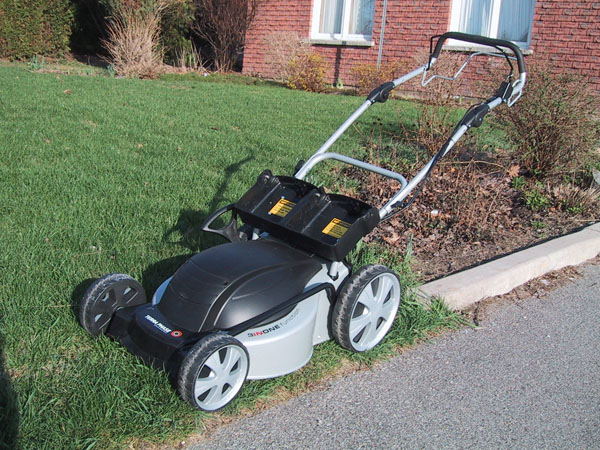
In the simplest terms, what we are dealing over here is an electric lawnmower that runs on power of batteries that are eventually charged by an array of solar cells. It is going to cut all running costs and hassles, that you might have encountered till date, with your conventional fuel guzzlers. Not to mention, the numerous benefits it offers in terms of low maintenance and even lower environmental impact. Besides, it is not going be noisy even after you intend to make the worst possible use of it.
Difficulty level
The challenge is to convert a non-working gas mower by a system that runs on solar power. Anyone who has handled electric wires, circuits. Soldering rod and a bit of fitting, welding and metal cutting jobs can easily handle this project.
Time required
If you have all the equipment then, this article should be able to help you construct the lawn mower in less about 6 to 8 hours depending upon your skill level.
Resources required
You can pick any of those condemned gasoline lawnmowers that are lying idle in your basement or the storage shack in your backyard. Next, you will need a sound electric motor of 3 to 4 hp, which can run on 12 volt DC battery supply from a 40 AH battery. For power supply a solar panel of 11 watt rating and a charge controller (4.5 A, 12V) would be required. You can also add the usual Ammeter, Voltmeter, wires and switches as part of your resource list.
Estimated cost
At a very liberal estimate (considering you need to buy all these equipment from nearest stores) it should not cost you more than $700.
Instructions
Preparing and selecting right kind of motor for the job
As per your needs you might have to select motors and batteries with different capacities. In this article let us consider a lawn which takes nearly 45 minutes for mowing with a 3 hp gasoline lawn mower. Usually an electric motor of 1 hp is equivalent to a 3 hp of gasoline power. This means a 1hp motor with 58 A rating, running on 40 AH battery should run for about an hour as we will not be using the motor continuously at its peak power. This would do the job in this case.
Creating a permanent solar charging point
It’s not typically a very difficult task. You can fix the solar panel at you roof top and bring the connections down, where it’s easy to take the mower for charging. Moreover, lawns require trimming twice or at most thrice a month. This means you will always have a lot of time for charging of battery via solar panel.
Connecting charge controller
Charge controller needs to be connected between the solar panel and the battery. Its purpose is to stop reverse current in order to prevent battery discharge via solar panel when the sun radiations are not enough to generate enough electric potential. Another of its job is to regulate the voltage to the battery.
Overhauling the old mower
Perhaps the easiest part of the job is to take apart the IC engine from the body of your lawn mower. It needs simple loosening of bolts. Though, it’s possible that these might be rusted and in that case your job is going to become quite cumbersome. Once it is removed, carry out the necessary paint job, just to ensure it does not catch rust in future.
Fitting the motor and blades in place
It’s important to tightly secure the motor and blades in place with nut bolts. You might have to use extra washers for leveling. You might need to design the part that connects motor shaft with the blades.
Take a metal rod about 3/4″ in diameter and bore a hole into the rod nearly 3/8″ in diameter which is equal to the motor shaft diameter. You can slide this rod over the shaft of motor. Create a key way by milling so that this key connects rod to the shaft and prevents slipping while the shaft is rotating. The length of this rod should just be fine to project out of the hole in the base of your mower. Weld a 1/8″ thick metal plate to this rod as it’s going to serve as a base for bolting of blades. This is what you can call a blade mount. Drill holes about the size of your nut-bolts on this blade mount and attach the blades.
Attaching battery and creating electrical connections
It should not be a major issue to find place for securing the battery on a mower as the motor certainly does not take too much of pace. A mount could be created with some metal beams for securing the battery. The wiring is not very complex till you aware of the right terminals in battery. Make sure the ends are not loose and wires are not naked at places.
Frequently asked questions
Q.1. What does the Ampere-hour rating signify in a battery?
Answer- AH or Ampere Hour rating indicates that time a particular battery would last giving its peak power. For example 40 AH battery would give 40 Amperes of current for one hour.
Q.2 How much time a 12 volt battery would probably take to charge in normal sunlight via solar panel?
Answer- For a 11 watt solar panel time should be nearly 40 hours.
Quick tips
Try to use a lawn mower that is in better shape. A really rusty and loose lawn mower would take a lot of time for overhauling and would not require frequent maintenance.
Things to watch out for
Electrical connections needs to be perfect, otherwise there would be chances of short circuit and in worst cases it could even damage the motor.


