
If you are lucky enough to reside in a place where the sun shines for almost 300 days in a year, there is no reason why you would not like to build a small power generating block in your backyard using solar panels. Myth holds that solar panels are expensive to construct, but given below is a simple procedure which will help you construct solar panel capable of generating 60 watts of power that too within a reasonable range of cost.
Difficulty Level
One can pursue building the solar panels with moderate difficulty. Purchasing the required material at low cost is a prerogative and will require close scrutiny and also extensive search. Handling the basic unit of the panels, i.e. the cells will also be a bit difficult as they are extremely delicate.
Time Required
One can comfortably divide the task in parts and complete the construction within a maximum of two days.
Resources Required
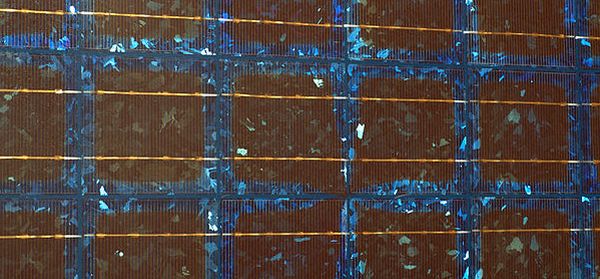
1. Solar cells: These are required for building the solar panel. New solar cells can be expensive to afford, but for this purpose even old and blemished cells can be used. These are easily available from EBay. A total of 36 bricks of 3*6 mono-crystalline solar cells will be required to make the panel. These cells are very fragile and for shipping purpose, they are dipped in wax in stacks of 18; removing the wax will be quiet irksome, but will keep the cells safe from damage. Make sure that cells come with metal tabs or else it will require double the amount of soldering. Each cell will ultimately produce ½ volt of power. The current produced by each cell is proportional to its size; therefore, bigger cells will produce more current. For the panel use uniform size cells, otherwise the smaller ones may hamper the potential of the bigger ones.
2. Plywood pieces: The chassis of the solar panel is like a shallow box, which can be made using plywood. Use a 3/8 thick plywood and wood pieces of the size 3/4 *3/4 to cover the edges of the panel. This shallow box should comfortably hold 36, 3*6 inch solar cells.
3. Glue and a few screws: These will be required for covering the edges of the box with wood pieces and also for fixing the center wooden partition.
4. Two Masonite peg-boards: These will be used as substrates on which the two subpanels will be built.
5. Two pieces of scrap Plexiglas: These will be used to provide the solar panel protection against weather. Glass can also be used, but its fragility makes it a poor choice. A single sheet of Plexiglas can also be used if available.
6. Paint: Several coats of paint have to given to the inside and outside of the box to protect it from moisture and weather. The peg-board pieces too need to be painted.
7. Low voltage soldering iron: For soldering together the cells.
8. Blob of clear silicone caulk: When the six string is ready this blob is placed in the center of each cell.
9. Copper braid: For interconnecting the two peg-board panels.
10. Schotty diode: With 3.3 amp current, will be used, but only during cloudy weather so that the batteries are not discharged.
11. Two pin jones plug: For supplementation of power.
Instructions
1. Removing wax from the solar cells: Take cold water in a pan and put in the wax covered solar cells. Keep on the pan on heat and gradually increase the temperature and do not allow the water to heat up to the boiling temperature otherwise the harsh thermal shocks just might harm the cells.
2. Next transfer the cells on a soapy water path, one at a time to remove all wax clung to it. Then finally give the cells a rinse in hot water. Do remember to keep changing the soapy water as well as the hot rinsing water when it becomes too much loaded with wax.
3. Finally, take these cells on a dry towel. A light film of wax might still remain. A solvent can be used for removal, but most of them toxic, smelly and even flammable.
4. Then draw a grid pattern on each pegboard, using pencil to mark the exact location and place each of the 18 cells to be put in each board. This will give you two half panels
5. Place the cells upside down on the grid so they can be smoldered together. Start smoldering two at a time using the low voltage smoldering iron. Give the cells are very light touch. Use the tabs on the cells as soldering points.
6. For soldering remember to solder the negative tab on the top of one cell to the positive tab on the lower side of the other cell. Use 6 cells to make a string. Repeat this to make 3 strings of for the two panels each.
7. Flip the strings over and apply some glue to the center of each cell and press it lightly over the pegboard panel
8. Once the two half panels are ready with the cells, connect them in series to get the desired voltage. Use the copper braid for connecting the two panels. Drill vents in the board and then insert the connecting wires through these vents.
9. Then place the two half panels into the frame and screw them up.
10. For each solar panel fix a blocking diode in series to avoid discharging of your battery during cloudy weather. One can use Schotty diode.
11. Drill a hole in the top back side of the panel as an exit for the wires. Use a silicone caulk to anchor it in place.
12. Screw the Plexiglas in place at last.
Quick Tips
- Use second hand, blemished cells for the panel. You will save on a lot of cost due to this
- Purchase extra cells, as they are too delicate and can get damaged while handling.
- Once the wax has been removed from the cells, do not fiddle much with the cells until installation, otherwise it might distort them.
- Use two pegboards and make two panels. Making two panels will keep the process easy and later they can be interconnected.
- Do not use glass in place of the Plexiglas, as glass is not as strong and will not be able to take the harsh weather.
- Always draw a sketch on the pegboard, before making the strings. This will help in precision.
Cost Estimates
The above description clearly tells that we need to save as much cost as possible so that domestic production is justified. The total cost should be somewhere around $105. Below is given the approximate cost of each item required.
- Solar cells – $74 ( if purchased from EBay)
- Plexiglas – $21
- Screws and glue – if available at home , then no extra cost
- Silicone Caulk – $4
- Diode – $ 0.20 with a few variations
- Jones plug – $ 6
- Paint – use paint lying at home.
- Miscellaneous cost – $ 21