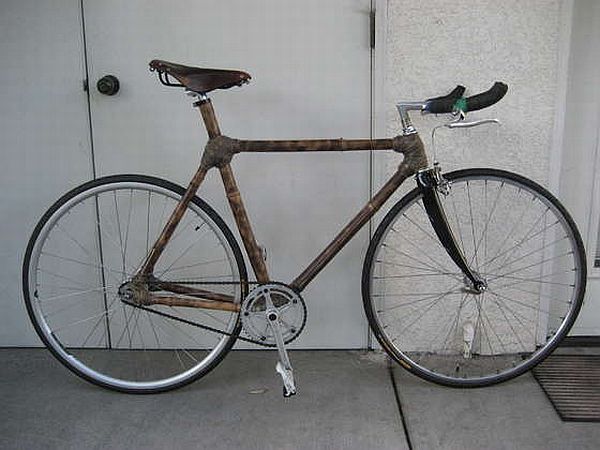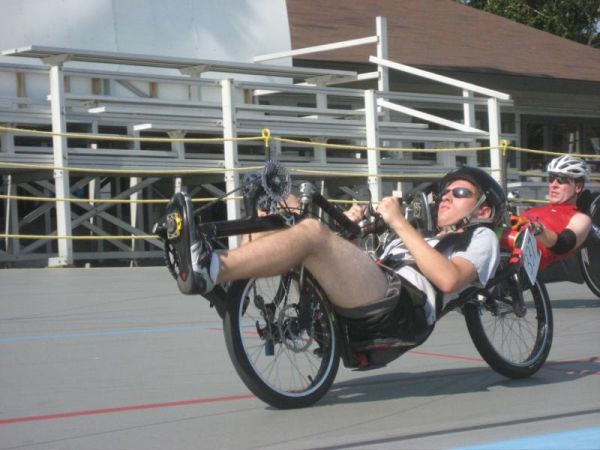

Now there is no more difficulty in making a fast as well as a low-cost recumbent bike that was very common during the 1980’s-era. This recumbent bike looks somewhat like the road bikes of the 1980’s with some bits from a scrap bike. A recumbent bike is a great bike from those bike riders who drive for long hours and feel sores in their back. But buying a new bike would cost you lot. So why not think of making a recumbent bike on your own using materials from the scrap. Well it’s not a bad idea. You just need to spare some time and take some efforts to put things in to place but its sure that you will have fun doing that. You can assemble a recumbent bike for just $100 excluding the painting cost.
Difficulty Level: Moderately challenging. It may need expertise in some areas.
Time required: This project may perhaps take a week’s work that too depending upon individual skills
Resources required:
1. 10 speed bike
2. 3 – 10-speed chains
3. 1 inch electrical conduit
4. Plywood and padding for the seat
5. ¼ inch threaded rod
6. 1 ½ inch square tubing
7. 1/8 inch x 2 inch x 8 inch and 3/32 inch x 1 inch x 3 feet mild steel
8. Two ¼ inch tie rod ends
9. Bolts nuts, washers as well as lock washers
10. Welder
11. Clamps
12. Hack saw
13. Screwdriver
Estimate Cost: $100
Instructions:
Step # 1: Slice off the rear triangle
Once you have brought all the required materials you can start with the work. Firstly you have to remove the rear triangle of the bike at the same time leaving the underneath bracket shell fixed to the front down tube. But before to start cutting, calculate the distance from the bottom bracket to the floor when you place the bike is vertical or standing position. While measuring keep the tires inflated.
Remove the seat stays from the seat tube using a hacksaw. Also cut the chain stays by staying close to the bottom bracket shell. Now cut the seat tube also from the bottom bracket shell ensure that you leave adequate fastened to the bottom bracket shell to mount 2 plus inches for the front derailleur.
Step # 2: Bend the seat stays
Ensure that the back wheel is pushed in far so that it goes in the dropouts. You can use the wheel to determine how much far the seat stays needs to bend. Bend the seat stays keeping the rear wheel and brakes on. Ensure that you do not bend it far enough that the brake bracket starts to rub on the wheel.
Keep the top portion of the seat stays parallel to the ground in a position when the cut chain stays are at a distance of 6 inches from the ground.
Step # 3: Make main tube bracket and weld
Cut off a 1/8 inch thick part of steel to weld the chain stays in position of the bottom bracket. Make sure that it is sufficiently wide to get in touch with the external edge of the chain stay. Now clamp this assembly erect at about 6 inches parallel from the ground. Later on weld to the chain stays along with the installed wheel. Grind the cut ends of the chain to keep it flat on the bracket.
Step # 4: Weld seat stays to the seat tube
It’s time to attach a new seat tube that will offer support to the seat back. So angle it properly at 30 degrees. The off cut part of the seat tube will be short, so use 1 inch conduit. Measure a piece that allows an angled cut at the bottom where the seat tube will join the main tube and then weld the new seat tube to the bent seat stays at the same time to the main tube at an angle of 30 degree.
Step # 5: Weld up the bottom bracket and front end
This a bit tricky part so carefully clamps a straight piece of metal across the down tube, the top tube and the new main tube to ensure that things are straight while welding. Keep wheels are on the frame and inflate it. Carefully weld it up. Once everything looks good, carefully grind all the welds.
Step # 6: Strengthen the steering tube
Cut and grind the top tube from the old bike and cut off a piece from the n 1 inch electrical conduit to fit across the old seat tube and later on to the main tube. Now grind a birdsmouth in the front derailleur tube and weld it ensuring that it is straight and centered. With this you have completed the basic frame.
Step # 7: Remote steering handlebars
First figure out where you wish to place the steering tube then measure and cut off a 1 inch conduit and grind to fit the steering as well as the main tube, and weld it. Now take the forks from the old bike and weld it on a tab that is of the size same as the front tab. Re-install the cranks, bottom bracket and pedals and then install the fiddle and remote handle bars.
Step # 8: Seat and brackets
The seat bottom should be 12 inches long and the back should be 18 inches. You can adjust the sizes as per your comfort and body. After cutting the pieces, round the edges. Now attach the seats and Cover it with a seat pad to add comfort while you ride it.
Step # 9: Chain management
Make chain rollers using the skate wheels. This will help the chain to be beneath the seat without having to rub it. Drill 5/16 inch holes close to the back and front of the seat and fit 4 inch – 5 inch bolts. Remove the skateboard wheels’ bearings. Ensure that the chain fits in the rollers perfectly. Install them using nylon locking nuts.
Step #10: Finish assembly
Ensure that the crank is perfectly placed and then install the back derailleur. Splice the chains as one and set up one brake. You might need tandem bike cables to arrive at the rear derailleur and front brakes. Ride your bike in a parking lot and check if you find any flaws. If yes then rectify it there and then.
Now you are done with everything you just need to pint this bike to make it look brand new.
Frequently asked questions:
Q. While welding, what are the precautions needed to be taken?
A. Other than personal safety you also need to be careful that the welding sparks don’t get on the tire. Either use any old tire or cover it with a damp cloth.
Quick tips:
Before you start welding ensure that there is no zinc left on the electrical conduit.
There is no issue if you make big holes from the chain stays in the bottom bracket shell. Just keep them straight so that you can re-thread the bottom bracket back to place later on.
Things to watch out for:
Clean up all the parts of the old bike before using it.
Ensure that you are properly grinding and filing the welds to make them look pretty. Do it right then. Do not wait to put everything in to place and then start with grinding.