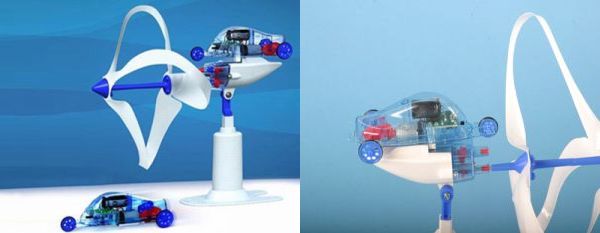
Just like a sailboat can drift effortlessly through the water in a smooth manner by harnessing the wind dashing on its sail as a source of power, in a similar manner the wind powered car makes use of the wind to run around. Owning one can be great fun altogether, also making one is extremely simple and requires little time, patience and simple resources to come around successfully. Use your homes portable fan as a source for your next wind powered toy car race with friends.
Difficulty Level: Moderate
Time required: 1-2 hours
Resources required:
- Cardboard
- Marker
- Empty Glass
- Scissors
- Glue
- 2 Straight Straws
- Tape
- Three Skewers
- Floor Fan
- Masking Tape
- Construction or Printer Paper
- Marker, Crayons or Colored Pencils
Estimate Cost: Economical
Instructions
- The car base needs careful designing. Draw an outline over the cardboard. This can be done irrespective of the size or shape you want it to be of. But the least dimensions of this car design should be 4 inches by 6 inches for best results.
- Take the glass and trace its base on the cardboard for four times respectively. Be careful about making smooth traces since these will form the wheels of your car.
- With the help of a sharp scissor one can snip out these cardboard pieces in a smooth and even manner. Cut clean and round for the some great wheels.
- Switch the base piece upside down and sketch out parallel line over it. These are the lines from where the wheel axles will pass, so one should be careful about forming perpendicular lines that are coordinated with the sides. Place one in front and the other one on the reverse side.
- Paste the straws to the vehicle bottom and cut out any extra straw for minimal weight and clean appearance.
- Pierce the cardboard wheel centers by using skewers. Glue these skewers well in place at the wheels end. Repeat the same with the other wheel and skewer too.
- Slide the skewers well into the straw and stick them to the car base from the bottom side.
- Pierce the other two wheels too through their center using skewers. Then paste these with the help of glue and be careful about not gluing the straw to the skewer. Slide these wheels holding them close to the car body. Then trim off the axles if any excess material remains.
- The middle of the base also needs to be pierced by using a skewer and poke this upwards. The skewers bottom should clear the floor mainly.
- Now it’s time for the wind mechanism which will be directed by the sails that need to be designed and drawn over a construction paper. Large sails will respond better by catching more wind but it actual is the makers personal choice to determine the shape of the sail. Well mark the top and bottom area of the sail that will be attached to the mast.
- The designed sail should be well placed on the mast. The marks made on the sail should be pierced and the sale should curve forward when fixed. To fix its place one can use a tape if the sail starts to slip.
Frequently asked questions:
- Can I color my car and its sail?
Ans. Yes, if you wish to add a personal touch then you can definitely color your car but it is important to remember that any unnecessary addition can actually turn your wind powered toy car bulky and hence slower. So keep it plain and light.
2. From where can I get all the making material?
Ans. Every listed resource here can be easily bought from a stationary shop or may even be a part of your craft inventory.
3. Can my wind powered car run on natural wind sources?
Ans. Yes, but only if the wind source is strong enough and channelized. However making use of the table fan is the best way to witness your wind powered car in maximum action.
Quick tips:
- Cut and craft out the car parts in a clean and light manner.
- Start with the base and follow on with wheels and the sail.
- Fasten each part well for best of results.
Things to watch out for:
If you notice that the car base is bowing down after the sail is attached to it then you can fix this problem by using a few skewers across the middle portion on the car.
Don’t substitute the listed resources with any other material.


