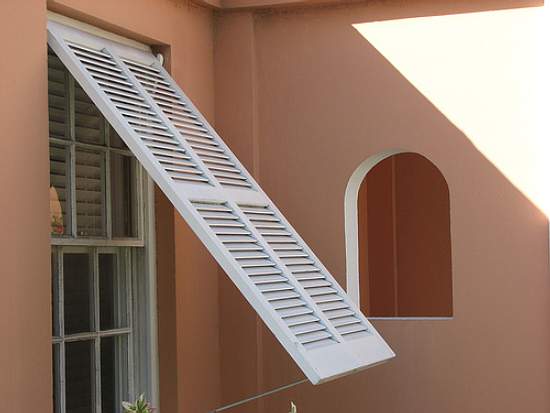
If you reside in an area prone to frequent storms, you should immediately install window shutters. The conventional hurricane shutters available in the market are either made of aluminum or tough fiber, which are not good for the environment. Here are a few tips about a DIY project of how to make and install hinged hurricane shutters made of plywood, which will be a greener option for your house.

Difficulty level
Moderate
Time required
3-4 hours.
Resources required
1. 15 mm exterior grade plywood
2. Measuring tape
3. Cutting saw
4. 2 metal hinges
5. 2 barrel bolts
6. Metal handle
7. Screws
8. A screwdriver
9. A hand drill
10. 2 window stoppers
11. Wood primer and paint
12. Dust mask
Estimated cost
The maximum cost is of the plywood which will be around $20 per window. The overall cost is likely to be $23-25.
Instructions
1. First of all, take the measurements of your window which you want to cover with the shutter. You can use the measuring tape for the same.
2. Mark the plywood board keeping an excess of 1/2 inch on either sides than the actual dimensions of the window. This is to ensure that the shutter fully covers and guards your window. Cut the plywood according to the markings with the help of the saw. Be sure to wear a dust mask while cutting the plywood, as wood dust may cause irritation in your trachea.
3. Place the cut piece of plywood board on the outer side of the window to check if the measurement and cutting are appropriate. Next, mark two places on the board and the window frame where you want to fix the hinges. Use the hand drill to punch holes, and fix the hinges using the screws which come along with its packing.
4. Now push out the ply board from bottom to check if it is swaying freely outwards. Measure the distance from the window base to the extent up to which you want the shutters to protrude outwards.
5. Adjust the length of the window stoppers according to the measurement taken in the previous step. Fix the stoppers near the bottom of the window frame with screw fasteners. Mark the points on the shutter where you want to fix the stopper hooks. Drill holes and fix the stopper hooks using screws.
6. Release the stoppers and let the shutter close down. Now you need to fasten the barrel bolts in order to close the shutters during a storm. Mark any place in the lower half of the shutter for this purpose. The lower you go, the stronger will be the hold of the barrel bolt.
7. Drill holes and fix the barrel bolts on both the lateral sides of the shutter. Mark the appropriate places for the barrel bolt receivers and fix them on the window frame. You can use the screws which come along with the barrel bolts.
8. Drill 4-6 holes at equal distances on the shutter to reduce its resistance to turbulent wind flow. These will also serve the purpose of ventilators.
9. Attach the metal handle at the center of the shutter. Fix it on the inner surface, so that you can operate it from inside your house.
10. Finally, apply a coat of primer and paint the plywood shutter to protect it from moisture and rot.
Quick tips
1. Do not use a thick ply-board as it will make the shutter heavy and difficult to operate.
2. Make sure to refer to your building codes before installing such shutters.
3. You can use multiple shades of colors to paint the shutter to give it a fashionable and trendy look.
Things to watch out for
1. Tighten each screw in the entire assembly to the maximum extent and ensure that none of them slips (especially those of the hinges), else your shutter may fall off the hinges during a storm.
2. Try to place the shutters a bit inside the outer surface of the wall. An outward protruding shutter may get caught by the wind.