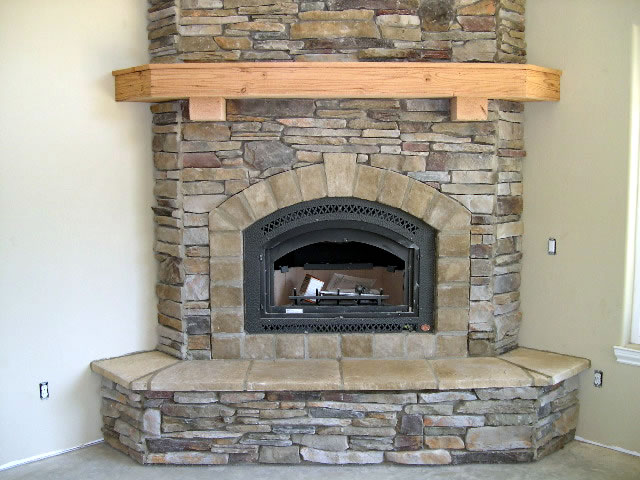
Installing mantels and shelves on the top of your fireplace adds a rustic and fashionable look to your interiors. Moreover, they are very useful for displaying artworks, photo frames, decorative elements, books, DVDs and a lots more. There are a lot of expensive models available in the market nowadays. You can easily make one for yourself at home using some basic tools and materials. The design discussed below is a detachable model and you can vary the number of shelves as per your will.

Difficulty level. Moderate.
Time required. 2 days per shelf.
Resources required:
- Measuring tape and marker pencil
- Wooden plank (about 2-3 inches thick)
- An electric saw-cutter
- A drill machine (preferably a hammering one)
- A 10 mm masonry drill bit
- A 8 mm wood drill bit
- Silicone glue
- Two “L”-shaped metal clamps
- Four anchor fastener bolts (diameter – 10 mm)
- Four nut bolts with double flat washer (diameter – 6-8 mm)
- Wood primer and paint
- Emery paper (both coarse and fine profiles)
- Safety goggles
- Hand gloves
Estimated cost. The overall cost involved to install one such shelf is about $40-50.
Instructions
- First of all, measure the width of your fireplace. This will be the length of your shelf. Now measure about 20-25 inches from the top opening of your fireplace. This will be the height of your shelf. Mark the place and mark a line on the wall indicating the position of the shelf.
- Next, measure, mark and saw the required length of the wooden plank for the shelf. Polish and smooth up the sharp and briskly cut edges of the plank using the emery paper. First use the coarse paper to remove bigger debris. Finally, use the paper with fine profile to do the polish work.
- Now, decide the places where you want to place the supporting clamps for the shelf. Mark up the middle line of the plank and decide two points which are equidistant from the middle line. See to it that you do not choose the points near the edges as it will be inappropriate. It is suggested that you leave out at least 8 inches from either edges and give the supports. Mark the holes accordingly on the wall to fix the “L” clamps.
- Fix the masonry drill bit to the drill machine and put it in the hammering option. Drill holes deep enough to engulf the anchor fastener bolts. Clean up the drill debris and fill in the silicone glue inside the holes. Place the metal clamps in place and dig in the anchor bolts through them. Allow the assembly to cure and settle (at least for 12 hours) before giving any load on the clamps.
- After the clamps are fixed properly on the wall, place the wooden plank on it and mark the points where you need to make holes in order to fix it with the clamps. Use the carpentry wood drill bit to make holes in the wooden plank. Make sure that you have deactivated the hammering option in the drill machine, or else it will ruin the wooden plank. Clean up the debris and polish the surface near the holes with the emery paper.
- Place the plank on the clamp supports and bolt it up using the nut bolts and flat washers. Use flat washers on both sides for better support and consistency.
- Put a layer of wood primer on the mantel shelf you have just made and wait for it to dry up. Finally, you can color it with the paint which matches your brand new fireplace shelf with your interiors.
- Repeat steps 3-7 in order to make multileveled shelving above your fireplace. This model enables you to vary the number of shelves anytime. All you need to do is to fasten or unscrew the wooden planks from their respective “L” clamps.
Quick tips
- It is suggested that you use teak wood or oak wood to make such a shelving arrangement on top of your fireplaces for better durability.
- You can also carve fashionable designs in front of the shelf.
- You can also use wooden supports in place of metal clamps.
- You can similarly fix vertical supports on both sides for resting books or DVD covers.
Things to watch out for
- Be careful while sawing wood with electric saw cutter and while drilling holes. Take safety measures and wear safety gears while working.
- Do not place the shelf too near the flue output of the fireplace, or else the wood may catch fire from the heat.
Ensure that you take proper measurements and that you have given an excellent finishing to your work, as this DIY project targets a trendy and cozy look for your interiors.