
Now this doesn’t require a great deal of technical knowledge, simple vision and some carpentry know-how is enough to make your own book shelf from a Mattress Box Frame. Wood always comes handy when we talk about furniture. So why not try utilizing the waste and give it some form.
Material required
1)Mattress box frame
2)Flathead screwdriver, hammer, pliers, measuring tape, and pencil
3)Approximately (16) 1.25″ Wood screws
4)Some sort of saw to cut wood (precisely!)
5)Drill
6)Sanders, stain, and varnish….if you like pretty things.
How to make your own book shelf from a Mattress Box Frame
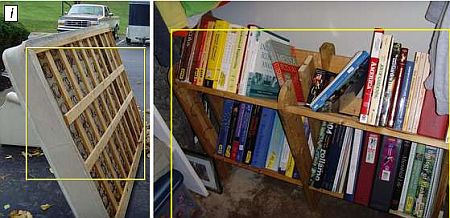
First things first, the first step pertains to the disassembling the mattress box frame. The tricky part is about removing the springs from the box (a screwdriver can come in handy).
Now all you have is wood, plain wood! Its time for cleaning and having an insight as to how much is the requirement.
45 degree angle on the shelves is cool. It allows you to browse your library without getting down on your hands and knees! The book frame design can be made according to the size of the books to be rested upon.
Making cuts is where your carpentry know-how comes to play. My suggestion to you is make these cuts in a proper way so as to fit the formulated design, no harm if you can consult a carpenter for that matter.
Once you are done with the cutting (half the job is over), now its time to assemble them and putting it together.
What next? With the sections all secured together, the shelf is ready to carry some books!
Few notes on the book frame
1)Notice that the two outer supports in the middle are not secured. If you don’t have enough books to fill the shelves, you can use these as book ends to keep the books in place!
2)If you want to, you can add as many screws and cross bars to add stability to the frame.
2)
3)You can also add plywood to make the shelves solid, creating a sort of “trough” for random items.
4)Sometimes the springs may leave rings on the wood. Try to sand these rings off. The frame would also look very nice with some stain and polyurethane.
Via: Instructables